#1 개요
#1-1 일정
Nutri Capture 방향성 - 개발 일정표 (1차)
#1 현 개발 행태에 대한 문제점#1-1 과정의 완벽주의난 풋내기 프로그래머에 불과하다. 내가 만들 앱 또한 그저 그런 앱일 것이다. 적어도 처음 (출시할 의도로 만드는) 앱을 당연히 그럴 것이다,
kenel.tistory.com
이전 게시글에서 'ChatBar를 통해 전송한 MealItem의 name 속성을 LazyColumn에서 확인'할 수 있었다. 이제 다음 작업은 계획표 상, 'nutritionInfo 각 프로퍼티에 1대1로 대응되는 아이콘을 가져오거나 제작함'이다.
#1-2 아이콘
아이콘을 어디에서 일괄적으로 다운로드하는 걸 생각했지만, 아이콘 간 통일성이 떨어진다는 문제점이 있다. 그래서 직접 그리기로 했다. 물론, 너무 많은 시간을 투자하지 않을 것이다. 이게 어떤 아이콘인지 알아볼 수만 있는 수준의 퀄리티면 된다.
#1-3 Inkscape
Overview | Inkscape
Overview For Designers of all Kinds The design process may begin by doodles on a napkin, a sketched mindmap, a photo of a memorable object, or a mockup in software which really wouldn't work to complete the project. Inkscape can take you from this stage to
inkscape.org
무료 프로그램인 Inkscape를 통해 SVG 아이콘을 제작했다.
#2 제작된 아이콘

글 읽는 순서대로 data class인 NutritionInfo의 프로퍼티 'overeatingExcess', 'fiberQuality', 'sodiumExcess', 'proteinQuality', 'flourExcess', 'refinedGrainExcess', 'refinedSugarExcess' 다.
아이콘을 제작하면서 든 생각은, 괜히 회사에 '디자이너'라는 직책이 있는 게 아니라는 것이다. '디자인 자원'(Asset) 제작은 프로그래머가 '프로그래밍하는 겸사겸사 할 수 있는 일'이 절대 아니다.
내가 만들긴 했지만 위 아이콘들이 정말 마음에 들지 않는다. 이런 퀄리티의 아이콘을 프로젝트에 넣어 Commit하느니 차라리 죽고 싶을 정도다. 그 정도로 저항감이 거셌다. 하지만, 이 결과의 완벽주의가 날 죽여오지 않았나. 나중에 다시 깔끔한 아이콘으로 교체할 날이 올 것이다.
#3 작동 확인
#3-1 svg 파일 첨부

완성된 #2의 아이콘 svg 파일들을 안드로이드 프로젝트에 넣는다. [drawable 폴더 우클릭] - [New] - [Vector Asset]에서 svg 파일을 넣으면, 위와 같이 xml 파일 확장자로 프로젝트에 추가된다.
#3-2 MainActivity.kt
...

class MainActivity : ComponentActivity() {

    ...
    override fun onCreate(savedInstanceState: Bundle?) {
        ...
        setContent {
            NutricapturenewTheme {
                ...

                Scaffold(
                    ...
                    topBar = {
                        TopAppBar(
                            title = {
                                ...
                            },
                            actions = {
                                IconButton(
                                    onClick = {
                                        navController.navigate("statisticsScreen") {
                                            popUpTo(navController.graph.findStartDestination().id) {
                                                saveState = true
                                            }
                                            launchSingleTop = true
                                            restoreState = true
                                        }
                                    },
                                ) {
                                    Icon(
                                        painterResource(id = R.drawable.stacked_line_chart),
                                        contentDescription = "통계"
                                    )
                                }
                            }
                        )
                    },
                    ...
                    }
                ) { ...
                    ...
            }
        }
    }

    ...
}

...
#3-1에서 추가한 아이콘을 StatisticsScreen에 임시로 둘 것이다. 이를 위해, Top bar에 StatisticsScreen으로 이동하는 네이게이션 버튼을 추가했다.
#3-3 StatisticsScreen.kt
...

@Composable
fun StatisticsScreen(
    scope: CoroutineScope,
    snackbarHostState: SnackbarHostState
) {
    val nutrientIcons = arrayOf(
        painterResource(id = R.drawable.pan_tool_alt),
        painterResource(id = R.drawable.flour_excess),
        painterResource(id = R.drawable.fiber_quality),
        painterResource(id = R.drawable.sodium_excess),
        painterResource(id = R.drawable.protein_quality),
        painterResource(id = R.drawable.overeating_excess),
        painterResource(id = R.drawable.refined_grain_excess),
        painterResource(id = R.drawable.refined_sugar_excess)
    )

    LazyVerticalGrid(
        columns = GridCells.Adaptive(minSize = Dimens.IconButton.targetSize),
        modifier = Modifier
            .fillMaxSize()
            .padding(16.dp),
        horizontalArrangement = Arrangement.spacedBy(16.dp),
        verticalArrangement = Arrangement.spacedBy(16.dp)
    ) {
        items(nutrientIcons) { nutrientIcon ->
            Box(
                modifier = Modifier.fillMaxSize()
            ) {
                FilledTonalIconButton(
                    onClick = {

                    },
                    modifier = Modifier
                        .size(Dimens.IconButton.targetSize)
                        .padding((Dimens.IconButton.targetSize - Dimens.IconButton.stateLayer) / 2) // 이 padding() 제거 시, stateLayer는 사라지게 됨 (= stateLayer가 targetSize와 똑같은 크기가 됨)
                        .align(Alignment.Center)
                        //.background(Color.Red),
                ) {
                    Icon(
                        painter = nutrientIcon,
                        contentDescription = "test",
                        modifier = Modifier.size(Dimens.IconButton.iconSize)
                    )
                }
            }
        }
    }
}
LazyColumn과 동일한 작동 원리를 가지는 LazyVerticalGrid를 둔다.
#3-4 스크린샷
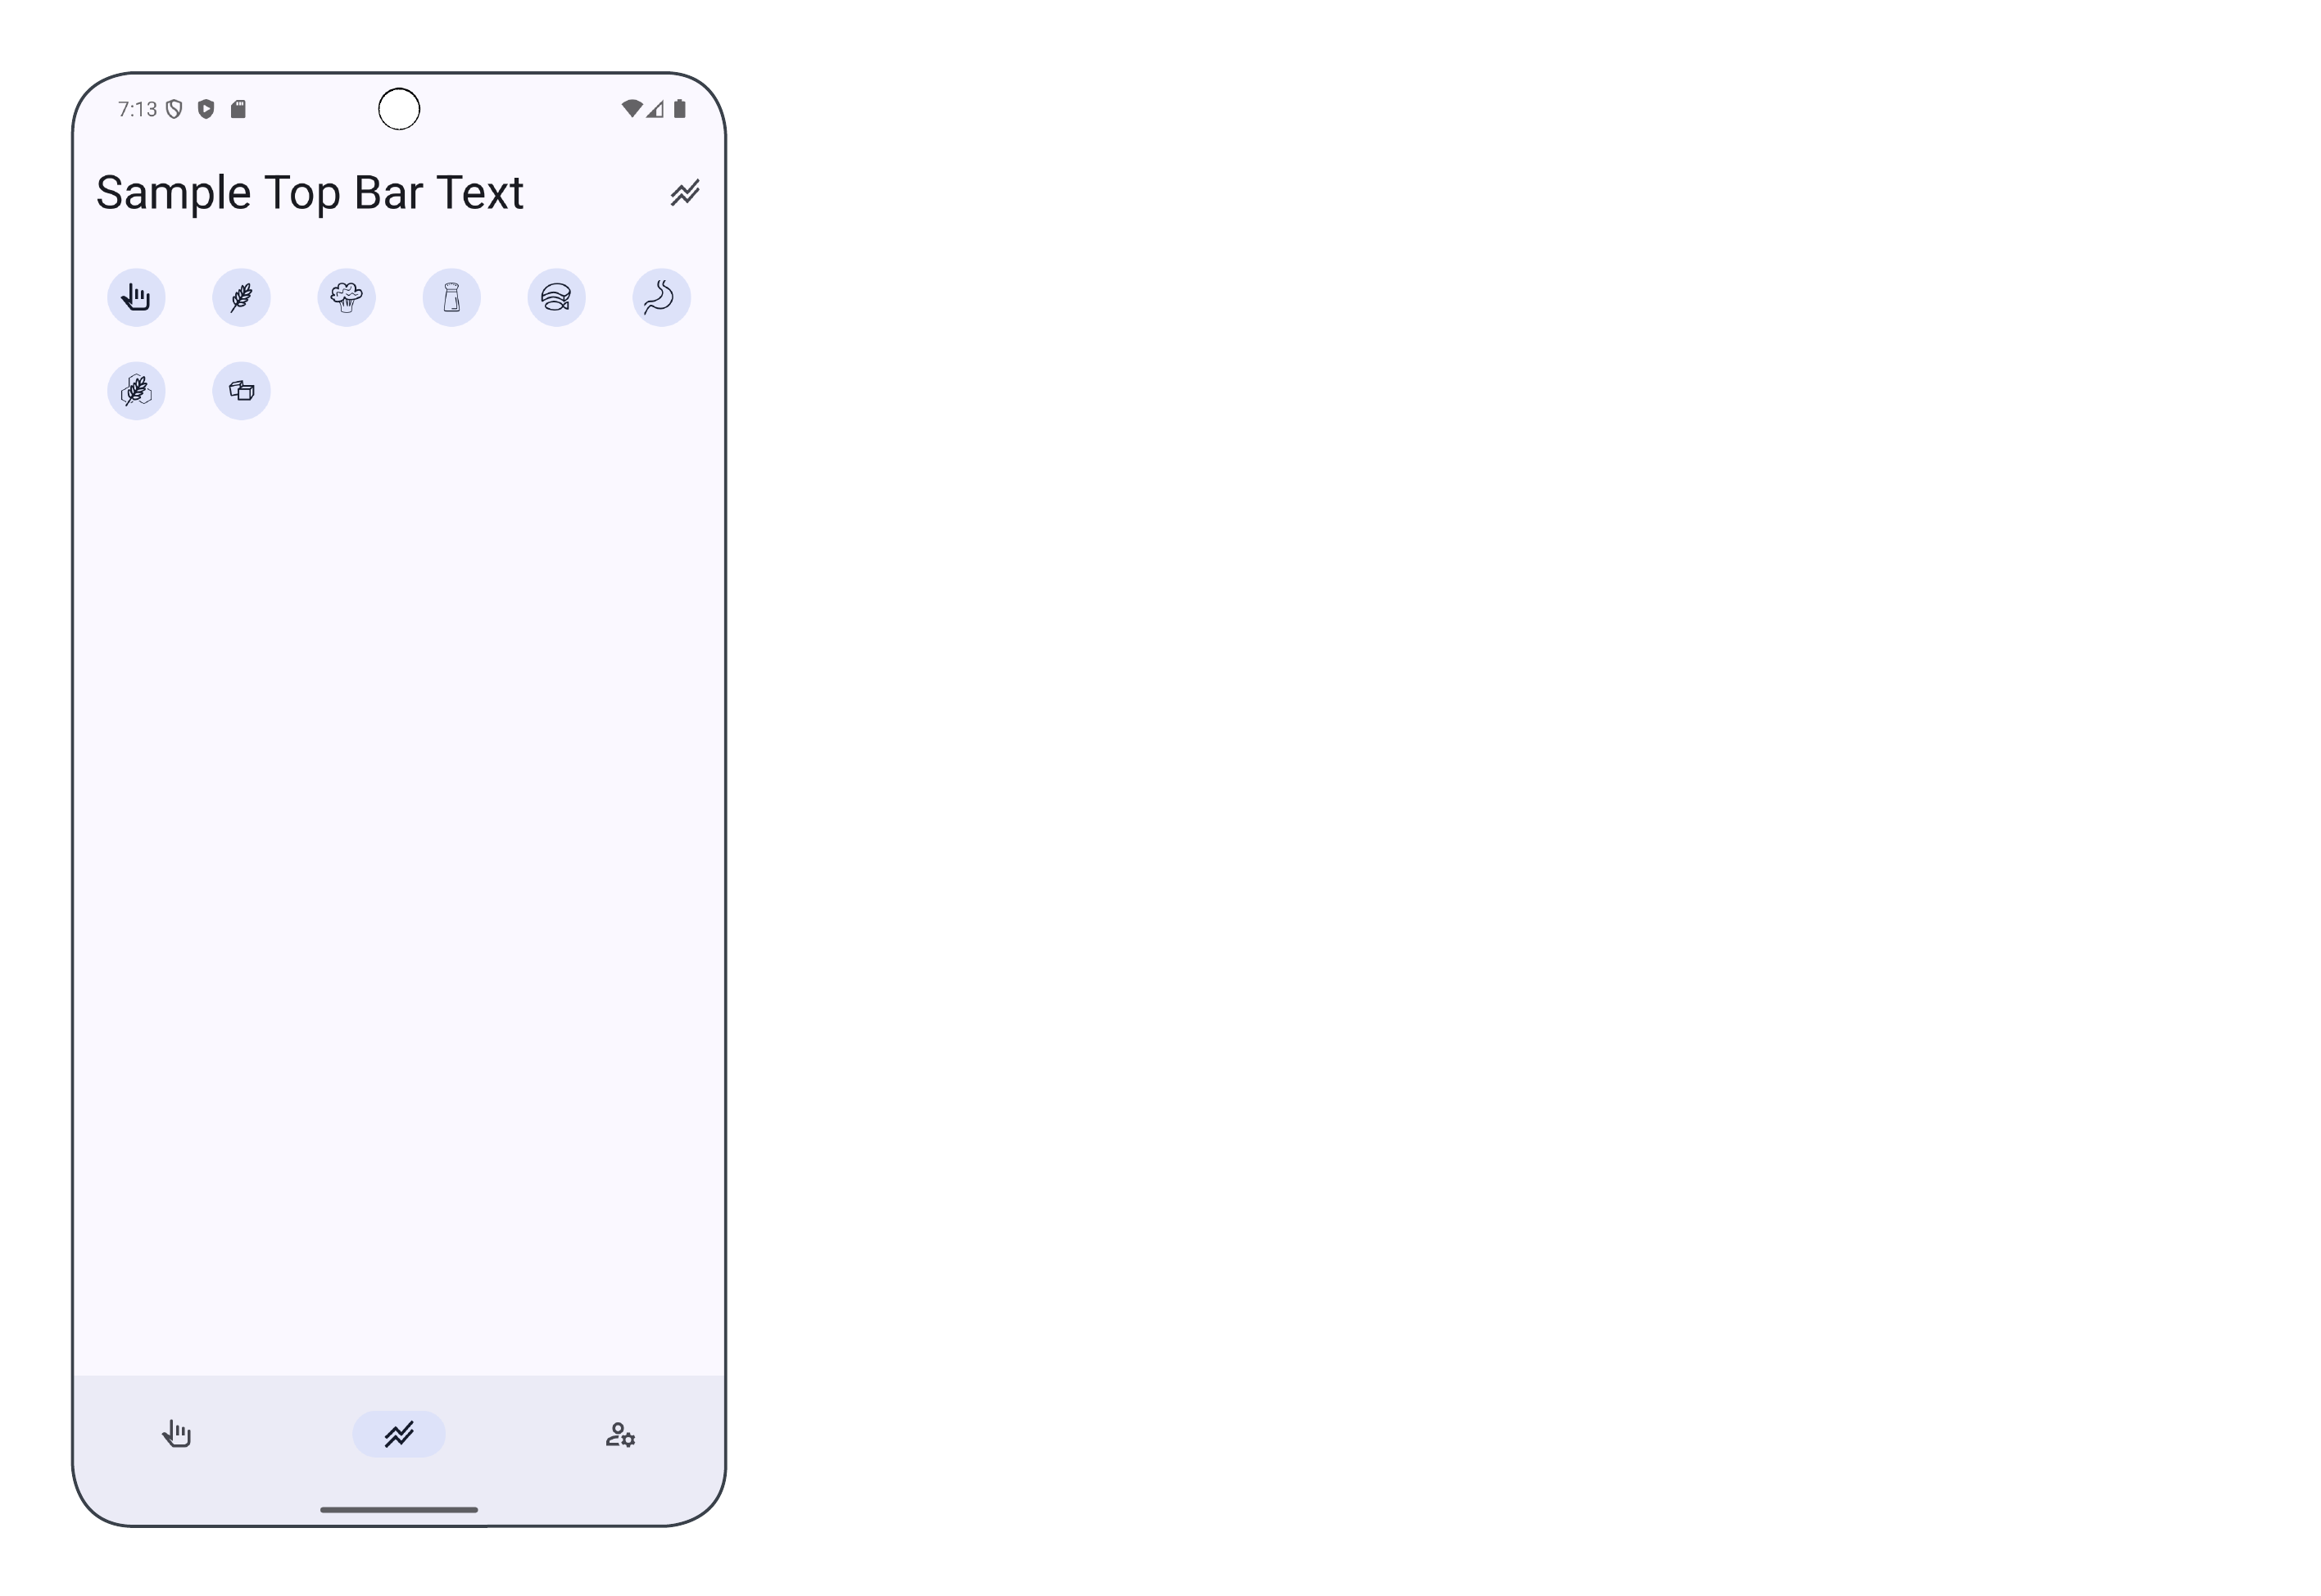
맨 좌측 상단에 있는 아이콘은 구글에서 제공하는 아이콘으로, 비교를 위해 넣었다. 저 정도 퀄리티가 될 때까지, 나머지 아이콘들을 업데이트 해 나간다.
#4 완성된 앱
#4-1 이 게시글 시점의 Commit
GitHub - Kanmanemone/nutri-capture-new
Contribute to Kanmanemone/nutri-capture-new development by creating an account on GitHub.
github.com
#4-2 본 프로젝트의 가장 최신 Commit
GitHub - Kanmanemone/nutri-capture-new
Contribute to Kanmanemone/nutri-capture-new development by creating an account on GitHub.
github.com
'개발 일지 💻 > Swemo' 카테고리의 다른 글
| Nutri Capture - windowInsetsPadding() 사용 (0) | 2025.01.29 |
|---|---|
| Nutri Capture - 코드 정리 (0) | 2025.01.29 |
| Nutri Capture - StateFlow로 전환 (0) | 2025.01.02 |
| Nutri Capture - ChatBar에 ViewModel 연결 (0) | 2025.01.02 |
| Nutri Capture - 개발 일정표 (1차) (0) | 2024.12.31 |