#1 Layout
#1-1 개요
Compose 레이아웃 기본사항 | Jetpack Compose | Android Developers
이 페이지는 Cloud Translation API를 통해 번역되었습니다. Compose 레이아웃 기본사항 컬렉션을 사용해 정리하기 내 환경설정을 기준으로 콘텐츠를 저장하고 분류하세요. Jetpack Compose를 사용하면 앱의
developer.android.com
기본 XML 방식에서 사용했던 LinearLayout과 같은 Layout은 Jetpack Compose에서도 Composable의 형태로 존재한다. 이 Layout에 대해서 살펴본다.
#1-2 종류
Jetpack Compose의 기본 Layout은 Column, Row, Box로 구성된다. Column은 android:orientation="vertical" 속성을 지닌 LinearLayout에 대응된다. 자식 아이템들이 세로로 정렬된다. Row는 android:orientation="horizontal" 속성을 지닌 LinearLayout에 대응된다. 자식 아이템들이 가로로 정렬된다. Box는 FrameLayout에 대응된다. 자식 아이템이 부모의 어느 부분에 위치될 지를 일일히 지정한다. ConstraintLayout, LazyColumn, LazyRow, FlowRow, FlowColumn, Grid 등의 응용 Layout도 존재하는데, 기본 Layout을 다룰 줄 알면, XML에서와 비교해 쉽게 사용 가능하다.
#2 Layout 사용하기 - Column
#2-1 기본 Column
...

class MainActivity : ComponentActivity() {
    override fun onCreate(savedInstanceState: Bundle?) {
        super.onCreate(savedInstanceState)
        setContent {
            val modifier = Modifier.fillMaxSize()

            ColumnLayoutExample(modifier)
        }
    }
}

@Composable
fun ColumnLayoutExample(modifierParams: Modifier) {
    Column(
        modifier = modifierParams,

    ) {
        TextExample("1")
        TextExample("2")
        TextExample("3")
        TextExample("4")
        TextExample("5")
    }
}
자식 아이템이 5개 있는 Column이다.
#2-2 작동 확인 - 기본 Column

#2-3 Scroll 가능한 Column
@Composable
fun ColumnScrollExample(modifierParams: Modifier) {
    val scrollState = rememberScrollState()

    Column(
        modifier = modifierParams.verticalScroll(scrollState) // 스크롤 위치를 기억하지 않으려면, verticalScroll(ScrollState(0))

    ) {
        for (i: Int in 1..20) {
            TextExample("$i")
        }
    }
}
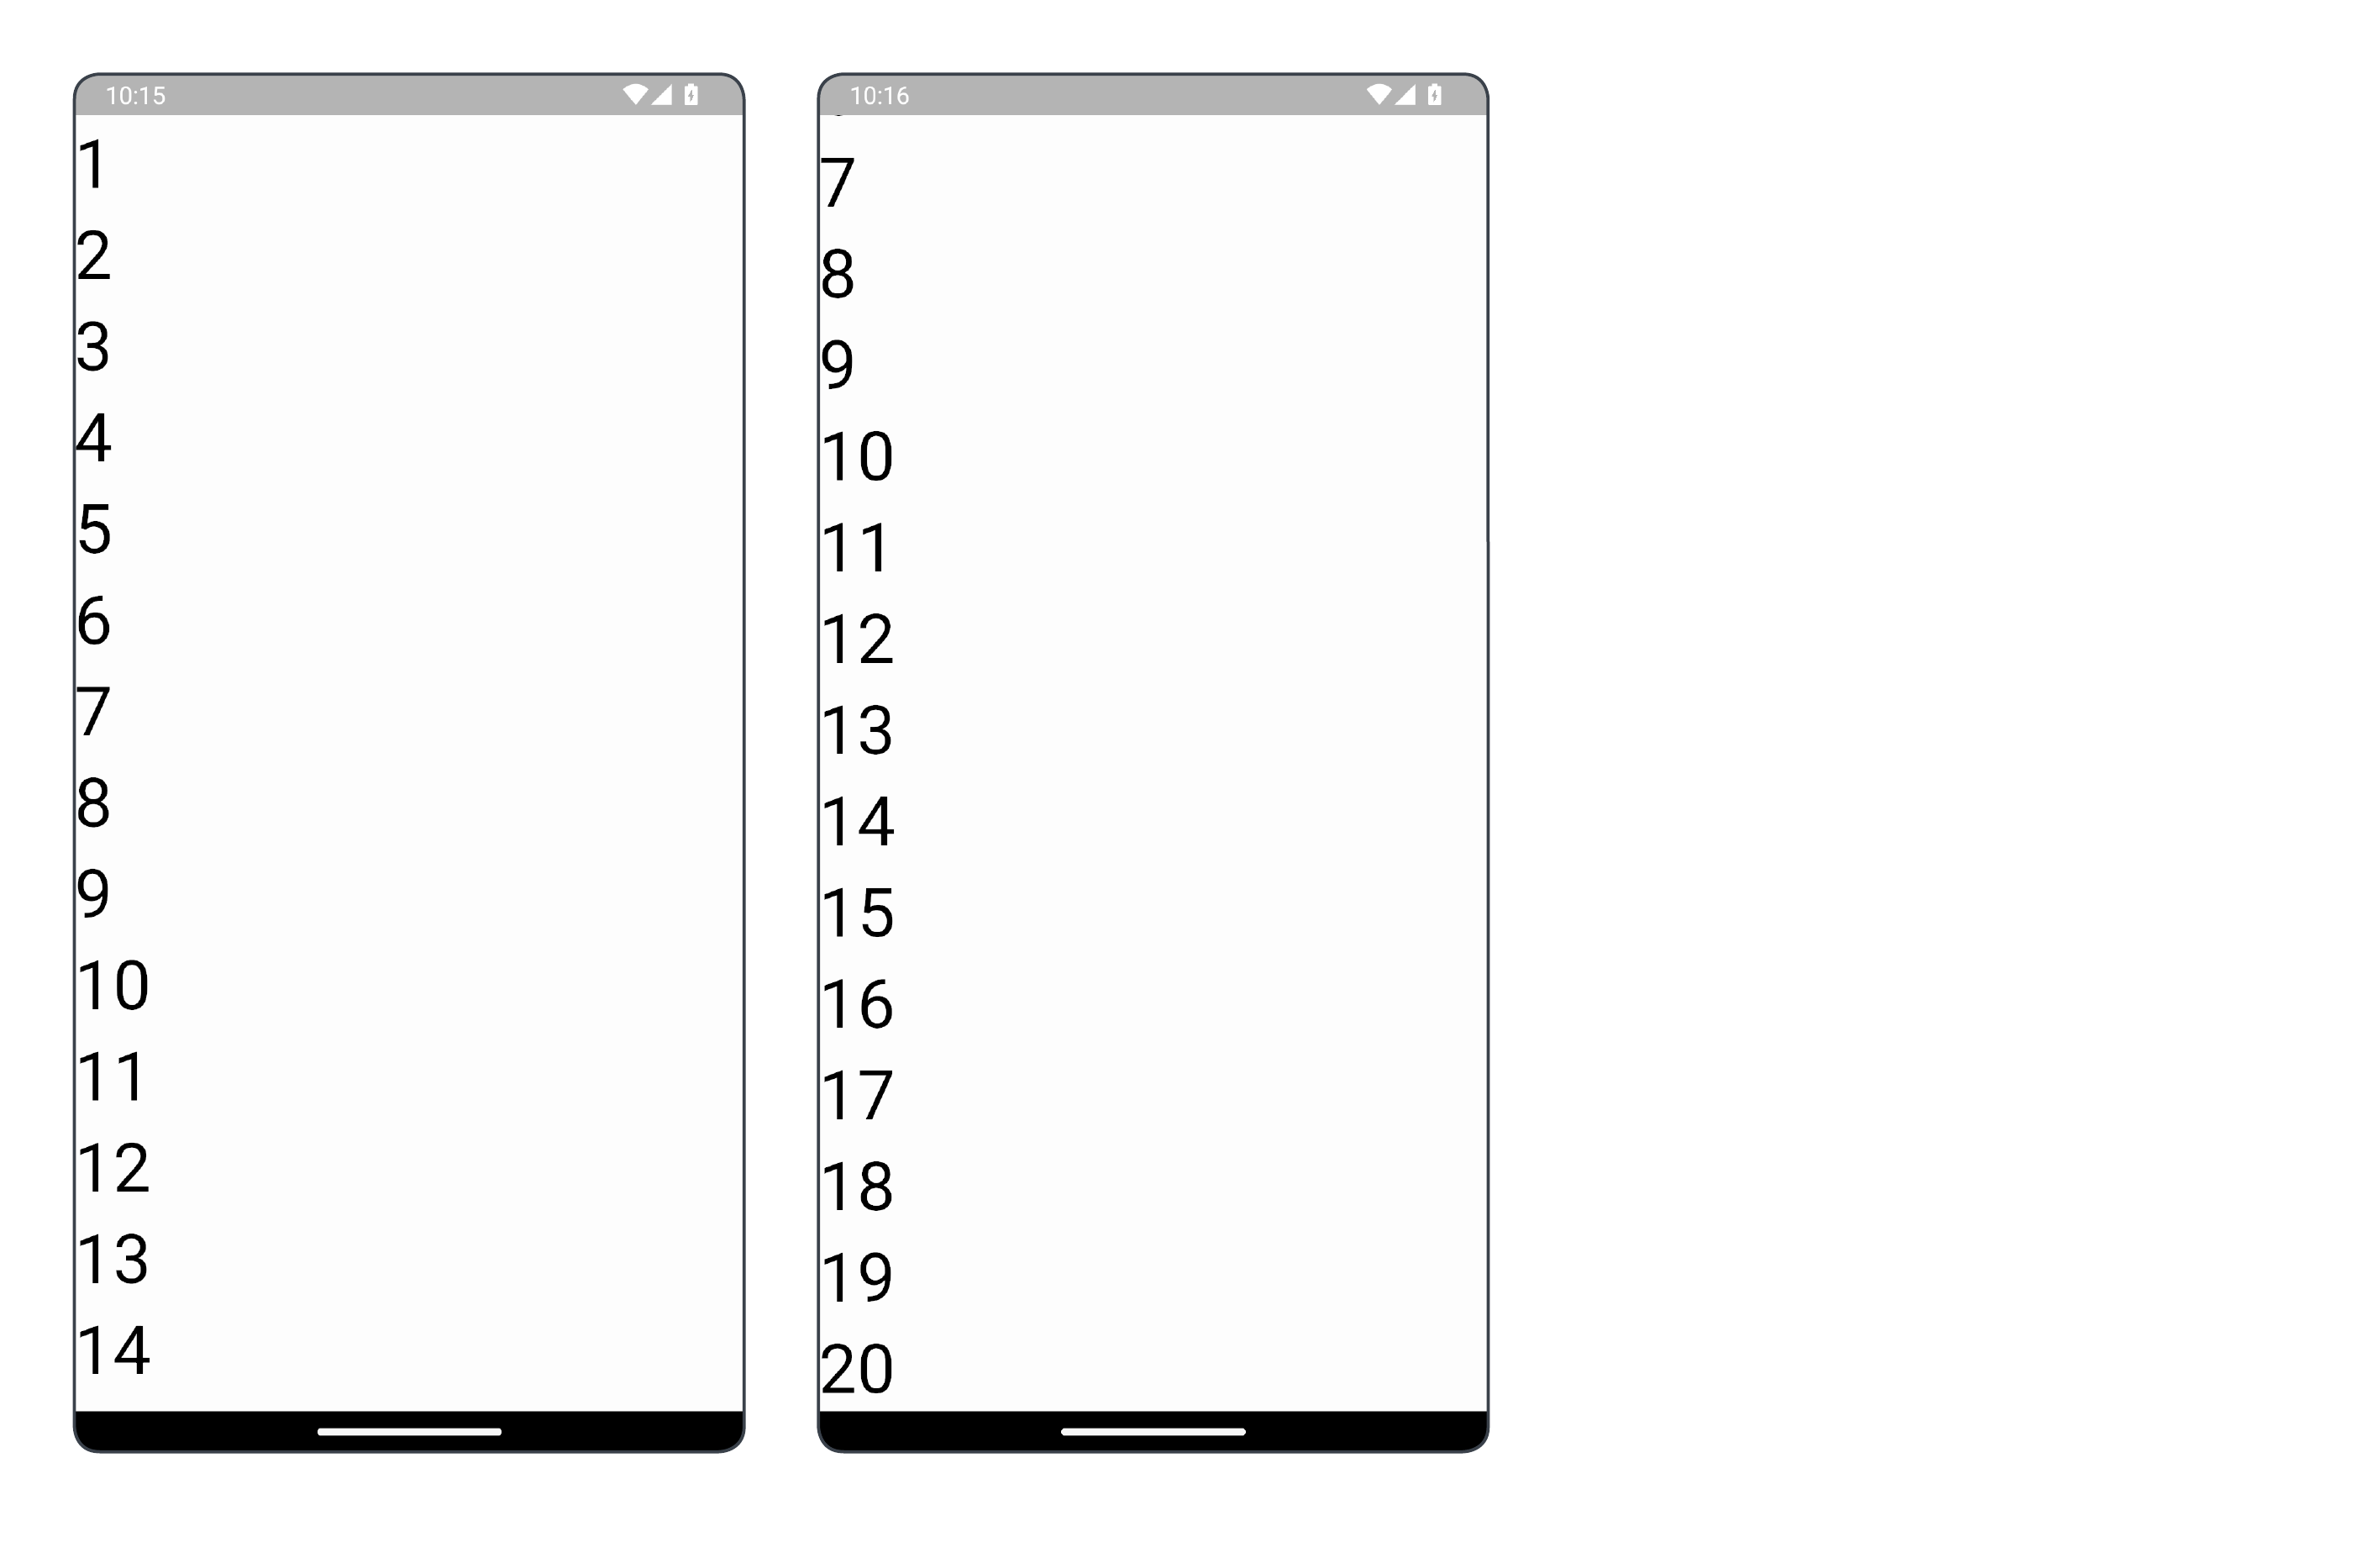
Column의 Modifier에 rememberScrollState()를 인수로 가지는 verticalScroll() 메소드를 적용한다.
#2-4 작동 확인 - Scroll 가능한 Column

#2-5 Arrangment 및 Alignment를 적용한 Column
@Composable
fun ColumnLayoutExample(modifierParams: Modifier) {
    Column(
        modifier = modifierParams,

        /* verticalArrangement: Arrangement.Vertical
         * Arrangement.Top (기본값)
         * Arrangement.Center
         * Arrangement.Bottom
         * Arrangement.SpaceEvenly
         * Arrangement.SpaceAround
         * Arrangement.SpaceBetween
         */
        verticalArrangement = Arrangement.Top,

        /* horizontalAlignment: Alignment.Horizontal
         * Alignment.Start (기본값)
         * Alignment.CenterHorizontally
         * Alignment.End
         */
        horizontalAlignment = Alignment.Start

    ) {
        TextExample("1")
        TextExample("2")
        TextExample("3")
        TextExample("4")
        TextExample("5")
    }
}
Column은 verticalArrangement 및 horizontalAlignment 속성을 가지고 있는데, 이 속성들로 자식 아이템을 특정 방식으로 정렬할 수 있다.
#2-6 Column Arrangement 직관적으로 이해하기

#2-7 작동 확인 - Alignment.Start를 적용한 6가지 Arrangment의 Column

#2-8 작동 확인 - Alignment.CenterHorizontally를 적용한 6가지 Arrangment의 Column

#2-9 작동 확인 - Alignment.End를 적용한 6가지 Arrangment의 Column

#3 Layout 사용하기 - Row
#3-1 기본 Row
...

class MainActivity : ComponentActivity() {
    override fun onCreate(savedInstanceState: Bundle?) {
        super.onCreate(savedInstanceState)
        setContent {
            val modifier = Modifier.fillMaxSize()

            RowLayoutExample(modifier)
        }
    }
}

@Composable
fun RowLayoutExample(modifierParams: Modifier) {
    Row(
        modifier = modifierParams,

    ) {
        TextExample("1 ")
        TextExample("2 ")
        TextExample("3 ")
        TextExample("4 ")
        TextExample("5 ")
    }
}
자식 아이템이 5개 있는 Column이다.
#3-2 작동 확인 - 기본 Row

#3-3 Scroll 가능한 Row
@Composable
fun RowScrollExample(modifierParams: Modifier) {
    val scrollState = rememberScrollState()

    Row(
        modifier = modifierParams.horizontalScroll(scrollState) // 스크롤 위치를 기억하지 않으려면, verticalScroll(ScrollState(0))

    ) {
        for (i: Int in 1..20) {
            TextExample("$i ")
        }
    }
}
Row의 Modifier에 rememberScrollState()를 인수로 가지는 horizontalScroll() 메소드를 적용한다.
#3-4 작동 확인 - Scroll 가능한 Row

#3-5 Arrangment 및 Alignment를 적용한 Row
@Composable
fun RowLayoutExample(modifierParams: Modifier) {
    Row(
        modifier = modifierParams,

        /* horizontalArrangement: Arrangement.Horizontal
         * Arrangement.Start (기본값)
         * Arrangement.Center
         * Arrangement.End
         * Arrangement.SpaceEvenly
         * Arrangement.SpaceAround
         * Arrangement.SpaceBetween
         */
        horizontalArrangement = Arrangement.Start,

        /* verticalAlignment: Alignment.Vertical
         * Alignment.Top (기본값)
         * Alignment.CenterVertically
         * Alignment.Bottom
         */
        verticalAlignment = Alignment.Top

    ) {
        TextExample("1")
        TextExample("2")
        TextExample("3")
        TextExample("4")
        TextExample("5")
    }
}
Row는 horizontalArrangement 및 verticalAlignment 속성을 가지고 있는데, 이 속성들로 자식 아이템을 특정 방식으로 정렬할 수 있다.
#3-6 Row Arrangement 직관적으로 이해하기

#3-7 작동 확인 - Alignment.Top를 적용한 6가지 Arrangment의 Row

#3-8 작동 확인 - Alignment.CenterVertically를 적용한 6가지 Arrangment의 Row

#3-9 작동 확인 - Alignment.Bottom를 적용한 6가지 Arrangment의 Row

#4 Layout 사용하기 - Box
#4-1 기본 Box
@Composable
fun BoxLayoutExample2(modifierParams: Modifier) {
    Box(
        modifier = modifierParams

    ) {
        TextExample("1")
        TextExample("2")
        TextExample("3")
        TextExample("4")
        TextExample("5")
    }
}
#4-2 작동 확인 - 기본 Box

Box에서는 자식 아이템에 Alignment를 지정하지 않으면 아이템들이 겹쳐버린다.
#4-3 자식 아이템에 Alignment를 적용한 Box
@Composable
fun BoxLayoutExample(modifierParams: Modifier) {
    Box(
        modifier = modifierParams

    ) {
        val fontSize = 30.sp

        TextExample("Top\nStart", Modifier.align(Alignment.TopStart), fontSize) // (기본값)
        TextExample("Top\nCenter", Modifier.align(Alignment.TopCenter), fontSize)
        TextExample("Top\nEnd", Modifier.align(Alignment.TopEnd), fontSize)
        TextExample("Center\nStart", Modifier.align(Alignment.CenterStart), fontSize)
        TextExample("Center", Modifier.align(Alignment.Center), fontSize)
        TextExample("Center\nEnd", Modifier.align(Alignment.CenterEnd), fontSize)
        TextExample("Bottom\nStart", Modifier.align(Alignment.BottomStart), fontSize)
        TextExample("Bottom\nCenter", Modifier.align(Alignment.BottomCenter), fontSize)
        TextExample("Bottom\nEnd", Modifier.align(Alignment.BottomEnd), fontSize)
    }
}
Box의 자식이 가질 수 있는 Alignment는 총 9가지가 존재한다.
#4-4 작동 확인 - 자식 아이템에 Alignment를 적용한 Box

#5 완성된 앱
android-practice/jetpack-compose/Layout at master · Kanmanemone/android-practice
Contribute to Kanmanemone/android-practice development by creating an account on GitHub.
github.com
'깨알 개념 📑 > Android' 카테고리의 다른 글
| [Android] Jetpack Compose - Lazy Column (0) | 2024.07.22 |
|---|---|
| [Android] Jetpack Compose - Button (1) | 2024.07.22 |
| [Android] Jetpack Compose - Modifier (0) | 2024.07.22 |
| [Android] Jetpack Compose - Surface (0) | 2024.07.22 |
| [Android] Jetpack Compose - 기초 (0) | 2024.07.22 |